Get More Tips At Gigs
A simple, yet effective way of getting your name and music in front of the audience and increase your tips at the same time.
Hello fellow songwriter!
I’m going to keep this simple. My objective? To show you ONE way to make more tips from your gigs.
We all play our fair share of paid gigs at restaurants, breweries, wineries, and bars. It’s hard work, but you play these gigs for few good reasons:
Earn Money. Once you’ve got a good hour or so of music, you are EMPLOYABLE. Go out and provide the service of music to those who want to pay you for it.
Honing Your Craft. Maybe you are newbie and you use paid gigs to cut your teeth. Maybe you’re a veteran songwriter refining those new songs you’re workshopping. Either way, paid gigs are a great way to do that. As the saying goes, “You’re getting paid to practice.”
Last, but not least, you LOVE playing music. Paid gigs are a great way to take your love of playing music from hobby status to semi-pro AND BEYOND!
Paid gigs are part of the game, part of the music biz. And you should ALWAYS get paid unless you have a VERY GOOD reason for playing for free (that’s a topic for another post).
But even if you ARE getting paid, you’re still gonna put out that tip jar as a way for the audience to say “Thanks for the music”. Some nights tips are great, others not so much.
But I’ve found a way to increase tips at gigs and I want to share this method with you
Bookmarks with a QR code that links directly to your Venmo account.
And they look like this:

I gig 1-2 times a week and over the past year I’ve made a little over $2000 in tips through my bookmarks alone. I consistently make 20-25% more each night as a result of using these bookmarks.
That may not seem like a lot .. but when you add it up, it’s at least an extra gig per month (if not two). These tips could fund a single, or buy new equipment. Margins in the music business are slim so why leave tips on the table.
The Magic Behind The Bookmark
Before I share with you HOW to make these bookmarks I want to talk a little bit more about WHY you should create bookmarks specifically.
More people see your QR code with these bookmarks. I see A LOT of artists putting a large QR code or their Venmo handle near the stage or merch table/suitcase. If your QR code is only visible in ONE spot you are automatically reducing the chances of patrons seeing, scanning, and ultimately tipping. When you set out the bookmarks at the bar and on each table in the venue … you are literally putting yourself and your music directly in front of the patrons. They don’t have to get up to tip you. This is handy. Many patrons want to tip as they leave the restaurant, but they get distracted paying the bill, chatting with friends, or making a pit stop to the restroom.
The bookmark makes it easier for patrons to look you up on social media. With your website or social handles on the bookmark, people can read about you, follow you, or sign-up for a newsletter. The bookmark is doing a lot of “introductory” work for you… all while you serenade them with your songs.
Bookmarks stand out in ways that other materials don’t. You might be asking, “Why a bookmark?” Good question. Here’s my rationale:
It’s not a business card. A bookmark sets you apart from other print collateral. Business cards strewn about a venue give the impression that someone just walked in from the street and canvassed the place. You didn’t do that. The venue wants you there to entertain and patrons understand that. A bookmark sets you apart from other print collateral. Plus you get a bit more physical space (6”x2”) than the standard business card (3.5”x2”)… which gives you the opportunity to feature not only the QR code, but your social handles, a picture, etc.
It’s not a flyer, either. Flyers, whether they are quarter, half, or full page can feel flimsy and cheap. You find flyers stuck in your windshield wipers when you come out of Target. That’s not the impression you want patrons to have of you and your music.
Bookmarks, especially when printed on light card stock feel like a premium leave behind. Which reflects positively on you. I’ve had patrons tell me that they took it home and use it as an ACTUAL bookmark. No one’s going to do that with a flyer. And these bookmarks hold up against wear and tear too. At the end of the night, I gather them up and pass them out at the next gig. And if one gets roughed up a bit, you simply recycle it.
How to make these bookmarks for yourself.
Method 1: Design it from scratch
Maybe you have a small amount of design experience with Photoshop, Photoshop Express, or Canva. If this is the case, you would simply download a template from a reputable online printer like:
https://www.vistaprint.com/marketing-materials/bookmarks
https://www.printplace.com/bookmark-printing
https://www.nextdayflyers.com/bookmark-printing/
Open the template into your desired software, finalize your design, upload your artwork, place your order and you’re done! You are on your way to better tips.
Method 2: Uprinting.com
I recently discovered that Uprinting.com allows you to design your own bookmark on their website and then send that design directly to print. This obviously saves you a step. But the main benefit is to those musicians/songwriters who don’t have much design experience or file handling experience. And that’s why I will focus on this method. The majority of people will benefit and be able to print their own bookmarks.
Method 3: Hire a designer
Maybe you already work with a graphic designer for your band merch/collateral/graphics. Send them this idea and I’m sure they can turn it around fairly quickly. I, personally, also provide this service to musicians. Shoot me an email: renemoffattmusic@gmail.com
What you will need to make your own bookmarks via Uprinting.com
You will also need these things if you are designing it yourself or having you graphic designer do it for you (minus the uprinting account)
A Uprinting.com account
Having an account will let you view the status of current orders, see past orders, view saved quotes and saved designs. Sign up with an email address and it’ll make everything a bit easier.
A Venmo account
I used to have the personal account but it asks users enter the last 4-digits of your phone #. I saw this as a barrier to quick tipping, so I opted for the business account.
Your Venmo QR Code Image
You can find this on the Home Screen when you open your Venmo app. Essentially you want to email yourself a PDF or Image file of the QR code as it will be the highest image quality for printing. The screenshots below show the steps to retrieve your QR code image.

Your band logo or your artist logo
This isn’t absolutely necessary but a logo/identity for your band or yourself (if you are a solo artist) definitely makes you look more legitimate as an artist. A transparent .PNG is the best, but a .JPG will do as long as it is a large file size (it’ll print better).
An artist picture
This should be a professional photo that shows you with your instrument or of you playing live. This helps put a face to the name, if you will. It is common to only have .JPG’s of this image. The higher the resolution the better.
Additional details:
Your website URL. i.e. JohnSmithMusic.com
1 or 2 of your preferred social media handles like instagram and/or tik tok.
Your PayPal URL (this is optional and only serves as an alternative tipping location)
Design your bookmark with Uprinting.
Log into Uprinting.com and navigate to Marketing Materials > Bookmarks


You can change text size, color, and font with the controls at the top of the page.
Congrats!
You are halfway home.
At this point you have designed the front of your bookmark. See how easy that was? Now it’s time to design the back.
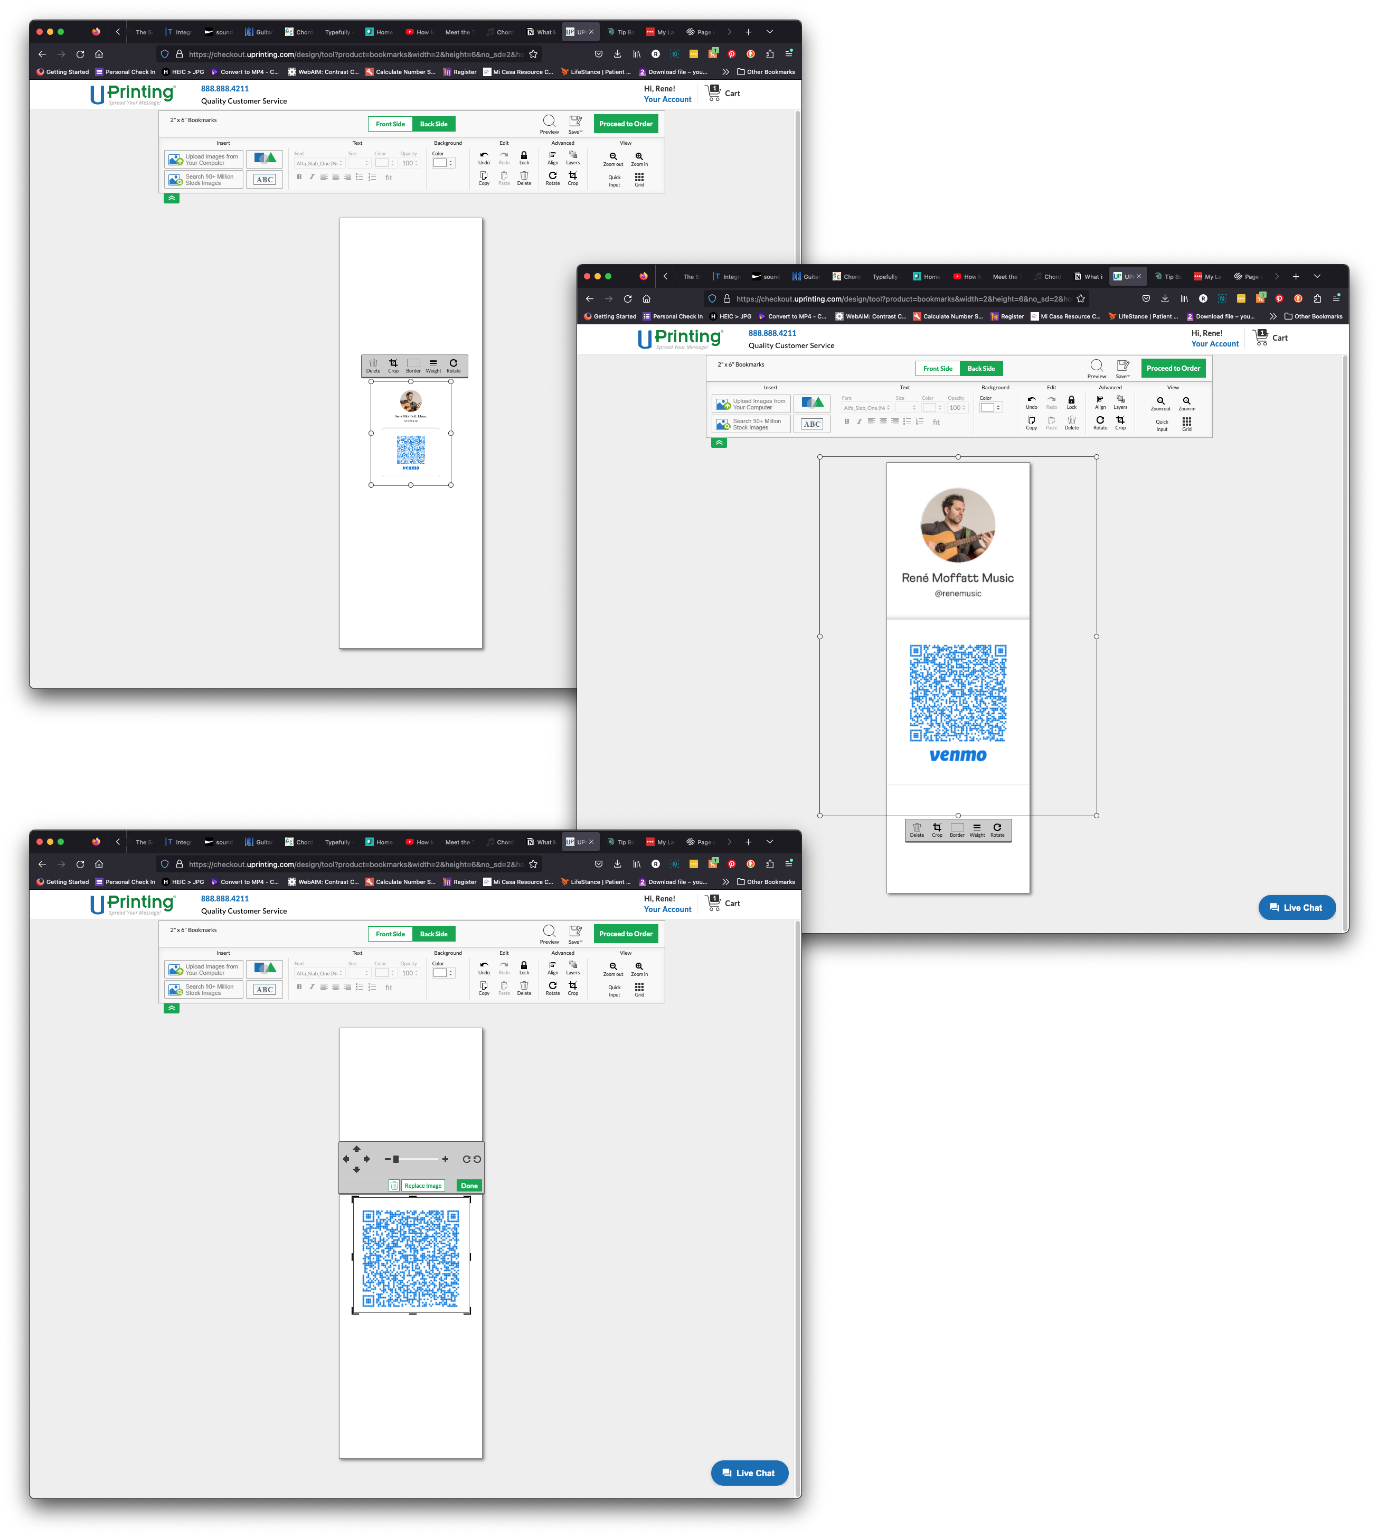
Click on the “Upload Images…” button
And add your QR code image/pdf.

Grab the corner of your image to scale your QR code up larger and reposition it in the center area of the bookmark.

Use the crop tool to only show the QR code portion of the image/PDF
Add some text
Here I provide a little bit of instruction as well as my Venmo handle (in case the QR code is glitchy) as well as an alternate payment method.
Note: I rarely get PayPal payments through these bookmarks. And I’ve never had someone ask me for Apple Pay, Stripe, Zelle, or Cash App links. Venmo is really common when it comes to small tip amounts.
Optional text
It’s up to you… but I like adding a bit more text to the top and bottom of my bookmarks. It provides another encourage and thank patrons for tipping.
Congrats! You’ve designed your tip bookmark.
You can preview your design by clicking the preview button:

And last but not least SAVE your project by click the save to disk button:
If you SAVE you can come back to your design to make changes OR reuse the same design in the future when you need to reorder bookmarks.

Now let’s place your order
Send your bookmark to the printer by clicking the “Proceed to Order” button.
You’ll be taken to the Shopping Cart page where you bookmark and its order details are all listed out. From here you can edit a handful of options or go back and alter your design if needed.
If everything looks good click the “Checkout Now” button and place your order.

On this page/screen you will pre-select your printing and quantity options. There are a few options to choose from but here is my recommendation:
Size: 2”x6” (most common bookmark size)
Paper Type: 14pt. Cardstock Uncoated (14pt is a sturdy weight and uncoated is better than glossy. (Glossy tends to feel cheap.)
Printed Side: Both Front and Back
Rounded Corners: Your choice. I like sharp corners.
Hold Drilling: No
Bundling: None
Quantity: Your choice. The more you order, the cheaper the price per bookmark.
Printing Time: Your choice.
Once you’ve made your selections click on “Create Your Own Design Online”
Choose your design orientation. Your choice, but I prefer vertical.


The design editor. This is where the fun begins.
This is where you will design your bookmark similar to mine (as an example)

First step, upload all the assets you’ll be using to design your bookmark. To do so click on the “Upload Images From Your Computer” button:

You will see the “Insert Image” pop up.
Drag and drop the following assets from your computer to the pop up window:
• Your Venmo QR code image/pdf.
• Your band/name logo
• Your bio photo
After your assets are all added, select your bio photo then click the “INSERT IMAGE” button.
Your design editor will show your bio photo on the canvas. Resize your photo bigger and into a good position.
TIP
You will be able to scale and reposition any of your assets.
Add your logo and change the background color if you so desire.
Add a dark colored rectangle to the bottom of your bookmark to serve as a background for some text we’ll be adding.


Click the “Back Side” button to flip over to the back of your bookmark design which will show a blank white canvas.
Here we will add some more messaging as well as your QR code for scanning.


Woohoo! You’ve done it.
Once you receive your bookmarks, stick them in your gig bag and place them on the tables and bar at your next gig. Yes, you’ll make more tips, but you will also engage with the patrons and audience more.
Tips for Usage
I like to set these out around 30 minutes before my set begins. It gives patrons a heads up that music is about to start, and often times they stick around to buy another drink and hear you play.
I DON’T hand these out to people. I set them out on the tables and bars. It’s less intrusive and people will pick them up cause they look so fancy ;)
I don’t typically ask permission from venue owners. These bookmarks don’t take up a lot of space and frankly, you are advertising FOR the venue that the MUSIC is about to start. I think that’s a good thing. Just make sure you pick them all up at the end of your gig that way they don’t litter the venue. Often times when I’m gathering them, its a great opportunity to chat with patrons.
People will bend, mangle, fold and spill stuff on your bookmarks. It’s okay. Just recycle them.
Happy gigging!

Was this helpful? Shoot me a tip:
Venmo: @renemusic
Follow me:
Instagram: @renemoffatt
Facebook: @renemoffattmusic
Tik Tok: @renemoffattmusic
Find me on:
Or signup for my mailing list:
Booking René Moffatt
Become A Supporter
About René
Whether you are looking for a solo, acoustic opener, a private house concert, or a songwriter who just “fits the bill”, check out René’s EPK for more details on booking a show.
Join Patreon and get early access to releases and behind the scenes previews of René’s songwriting life…
René Moffatt is a Denver-based singer/songwriter serving up heavy pours of poignant lyrics and resonant melodies. Born and bred amid the boomtowns of North Texas…
© René Moffatt Music 2023
Site Design by Wolftung Creative